- Posted on
- By admin
- In Boxes, Dish Box, Dish Pack Boxes, packing paper, Packing Paper for Dishes

How to Pack a Kitchen for Moving: The Complete Guide
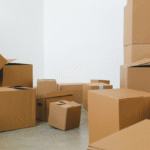
The kitchen is the hardest room to pack for moving. It contains fragile tableware, heavy household appliances, and oddly shaped utensils that seem to defy packing logic. But with the right planning, the kitchen packing process is simple and stress-free.
Start early. Give yourself at least two to three days just for the kitchen.
Step 1: Declutter Before You Pack
First, go through every cabinet and drawer.
Toss expired pantry items. Donate duplicates. Sell appliances you rarely use.
Consequently, you pack less — and spend less on boxes and supplies.
Step 2: Acquire Necessary Packing Supplies
Buy these things in advance:
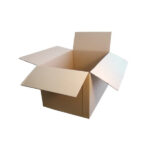
* Moving boxes for the kitchen (special boxes called dish-pack boxes with double walls)
* Boxes for moving your dishes (boxes that are designed for moving plates and bowls)
* Small moving boxes for moving your heavy kitchen stuff, like iron pots and canned food
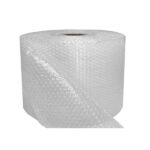
* Tape and bubble wrap for moving your fragile dishes
* Packing paper and foam envelopes
Pro Tip: Never use large boxes for heavy items. Small boxes keep the weight manageable and protect your back.
Step 3: Place fragile items first.
Knowing how to pack your fragile kitchenware properly will prevent disappointment when you make a move.
Here’s how to do it:
1. First, place some torn packing paper on the bottom of the box.
2. Next, pack each piece in separate bubble wrap.
3. Then, place dishes in an upright position – never horizontally. Upright positioning reduces shock.
4. Finally, pack empty spaces with packing paper.
5. Tape the box tightly.
Step 4: Learn How to Pack Glassware When Moving
Glassware is difficult to pack and move.
* Fill each piece of glassware with packing paper from the inside.
* Wrap the exterior surface of the glassware with double bubble wrap.
* Place the glassware upright, not sideways.
* Mark the box: FRAGILE – THIS SIDE UP.
Also, use the cell divider insert boxes if possible. This helps to prevent and minimise the damage caused by collisions.
Step 5: Packing everything else.
* Strategically packing heavy objects (cast-iron, appliances) into small boxes
* Place lighter items (Tupperware, plasticware) in larger boxes.
* Wrap appliance cords and tape them to the appliance itself.
* Pack your everyday essentials last — or set them aside in a separate “open first” box.
Step 6: Label Every Box Clearly
Label every box with:
* Room destination (Kitchen)
* Contents (Plates, Mugs, Pots)
* Handling instruction (Fragile, Heavy, This Side Up)
Therefore, movers handle boxes correctly, and unpacking becomes twice as fast.
Quick Packing Checklist
Item
Plates and bowls
Glasses and mugs
Cast iron/ Heavy pots
Small Appliances
Pantry items
Box Type
moving boxes for dishes
Kitchen moving boxes
Small boxes
Medium boxes
Medium boxes
Special care
vertical + bubble wrap.
Cell dividers + paper stuffing
Double-tape the bottom
Wrap cords separately
Seal open packages in zip bags.
Frequently asked questions
How far in advance should I start packing my kitchen for moving?
Start at least 3–5 days before moving day. The kitchen takes longer than any other room because of its fragile and heavy items.
What are the best boxes to wrap your meals in?
Use two-sided dish packaging boxes specially designed as mopery boxes for dishes. They provide additional cushioning and significantly reduce rupture.
How do I pack wine glasses without breaking them?
Stuff the inside with packing paper, wrap the outside with bubble wrap, and pack them upright in cell-divider boxes. Label the box FRAGILE clearly.
Should I use newspaper instead of bubble wrap for dishes?
Avoid newspapers — the ink transfers onto dishes and glassware. Instead, use unprinted packing paper or bubble wrap for moving to keep items clean and protected.